Summary: Want to edit DVD in Premiere Pro with smooth workflow? The best solution is to rip and convert DVD to MPEG-2, the most compatible video format with Premiere Pro.

DVD, as all kinds of optical media, has becoming more and more popular in our daily life. Whether it's for a wedding video, a sport highlight film, or some other projects, more and more people have their video footage on DVDs these days. On the other hand, there must be some occasions when you want to edit your favorite DVD movies to make some modifications by Adobe Premiere Pro for its amazing editing capacity. While though Adobe Premiere supports lots of video and audio formats, such as 3GP, 3G2, ASF, DV-AVI, DV, FLV/F4V, M4V, MOV, MP4, MPEG, MPE, MPG, WMV, etc, DVD is excluded in this list. In order to enable DVD work with Premiere Pro successfully, here are two solutions provided for you!
Solution 1: Put the DVD into your computer player, open the DVD in Explorer, copy the folder Video_TS to your computer. Open the folder and rename all the files with the extension VOB to MPG. That's it. Premiere Pro will now import them.
Important note: This way seems to work only for non-protected DVDs. If you have some comerical DVDs, you may switch to the next solution.
Solution 2: The alternative trick is to rip the video contents out of the DVD disc and convert them to a Premiere Pro more edit-friendly video format like MPEG-2, which ensures teh maximum editing efficiency and quality when working with Premiere Pro.
The current software options for ripping a DVD movie to Adobe Premiere Pro are virtually endless. The most used software for us is Brorsoft DVD Ripper. As a Windows friendly program, its user-friendly interface and powerful capacity is suitable for both novice and pro alike Windows users. You can choose to rip one title or the entire DVD to MPEG-2 favored by Premiere Pro on Windows(Windows10 included). Plus, you can also trim, crop, add effect and merge files. This excellent DVD to Premiere Converter allows you to customize resolution, frame rate, bit rate for video, you can just keep the highest setting to get the ideal output effect. A good news is that it has its equivalent version for Mac users - DVD Ripper for Mac to extract DVD content and backup on your Mac.
How to Rip DVD movies to Premiere Pro with ease
Step 1. Load DVD movies
After downloading, install and run the program. As you can see, you can add the DVD movies you want to rip by clicking the “DVD disc” button on the main interface.
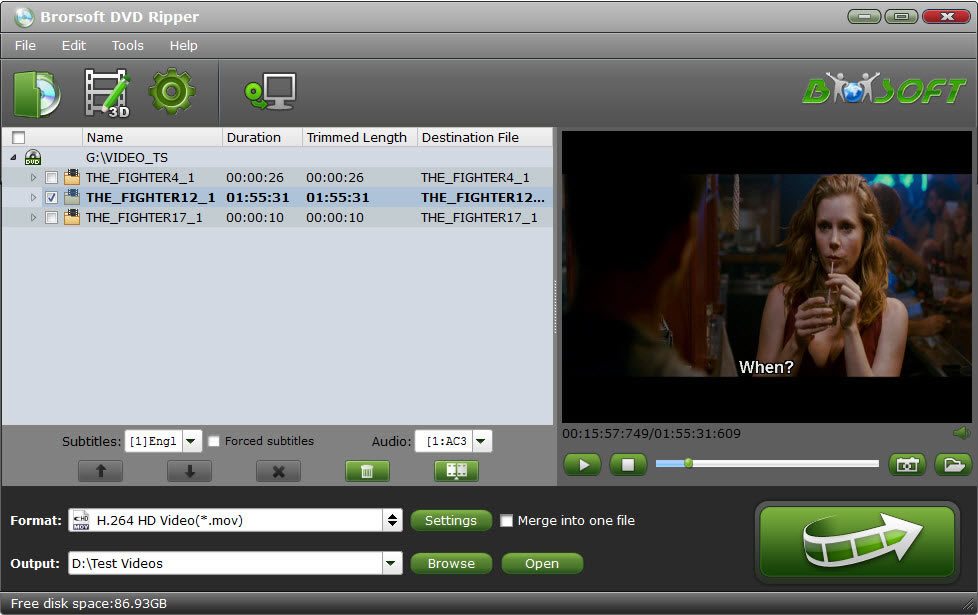
Step 2. Choose output format
Hit the Format box and select Adobe Premiere/Sony Vegas –> MPEG-2(*.mpg) as output format and then set the output destination as you want.

Tips: Adjust video and audio parameters if you need, including the Bitrate of Video and Audio, the Codec of Video and Audio, Video Size, Sample Rate, Frame Rate, Audio Channels, etc., in the Profile Settings Our recommendation of the settings is shown on the screen shot.
Step 3. Start converting DVD to Adobe Premiere
Finally, click Convert button to begin the DVD to MPEG-2 ripping. After the conversion finished, you can get the videos highly compatible with Adobe Premiere Pro CS3/CS4/CS5/CS6. Just launch Adobe Premiere Pro and import the converted videos to it and enjoy editing.
Related articles:
How to Transfer DVD to iMovie on Mac OS X
Tutorial on Ripping and Importing Blu-ray to Sony Vegas Pro 13/12/11/10
How to Rip and Convert DVD to Final Cut Pro X/7/6 freely
No comments:
Post a Comment