Wednesday, May 25, 2016

How to Import Nikon D5/D500 4K MOV footage to Final Cut Pro for further editing

Summary: This article aims to show you the best workflow of importing and editing 4K MOV videos from Nikon D5/D500 to Final Cut Pro X/7/6.

The Nikon D500 and full-frame D5 are the first Nikons to offer support 4K UHD capture at 3840 x 2160 at 30p/25p/24p. Both of them has the capacity to record UHD 4K video using the H.264 codec and MOV container video format. As a FCP user, chances are you wanna import Nikon 4K footage into Final Cut Pro for further editing only to encounter similar tricky issues as below:


"Hello, recently I bought the Nikon D5 DSLR and have used it recorded some 4K videos and 1080p MOV videos, the image quality is very excellent. Today I need to import Nikon D5 4K files and 1080p files to FCP 7 and edit the footage with FCP 7, but after I loaded the videos, I find the FCP can't edit Nikon D5 files smoothly, what's the reason? Are Nikon D5 videos not well supported by FCP? Any suggestion is appreciated, thanks!"

In fact, H.264 MOV videos from Nikon D5/D500 beyond the compatibility of FCP, and what's more, until FCP X 10.1, the old version FCP X or Final Cut Pro 6/7 like many editors use 1080p as primary delivery format and will continue to do so for a long time. In view of such factors, to ensure a smooth workflow of importing and editing Nikon D5/D500 4K files in FCP, the recommended suggestion is to compress and convert D5/D500 4K media to Apple ProRes, which ensures the maximum editing efficiency and quality when working with FCP X/7/6. Supposing you are confused about that, this tutorial below aims to take the Brorsoft Video Converter for Mac as example to walk you through the process of encoding Nikon D5/D500 4K recordings to ProRes .mov for FCP editing.

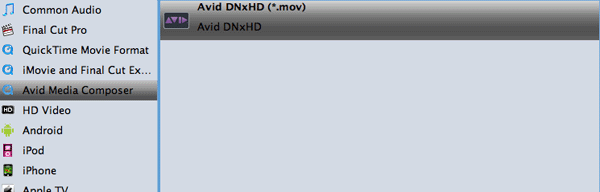
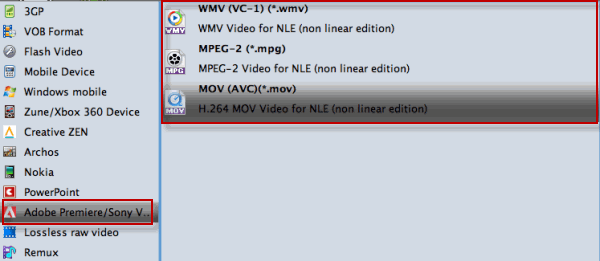
Overall, the Brorsoft Mac program, reputed as the best Mac Nikon 4K H.264 MOV Converter, boasts to transcode all Nikon 4K and 1080p MOV files to Apple ProRes for Final Cut Pro X/7/6, MPEG-2 for Adobe Premiere Pro, DNxHD for Avid Media Composer, AIC .mov for iMovie, Final Cut Express and more to satisfy your diverse demands. If you work Nikon MOV footage on Windows, please get Video Converter. So without further ado, let's begin our task.


Guide: How to encode Nikon D5/D500 4k video to ProRes for FCP?

Step 1: Open up Brorsoft Video Converter for Mac as a Nikon 4k Converter for Mac. When its main interface comes up, you can directly drag & drop the files onto the main interface, or you can click the "Add" icon to locate the videos from your local disk. Note that batch conversion is supported, so you can add several files to the converter at one time.


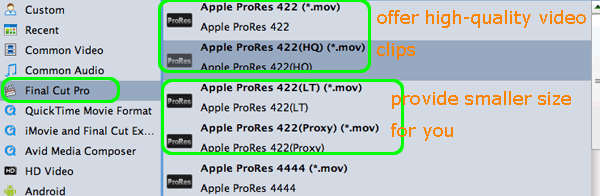
Step 2. Choose ProRes as output format

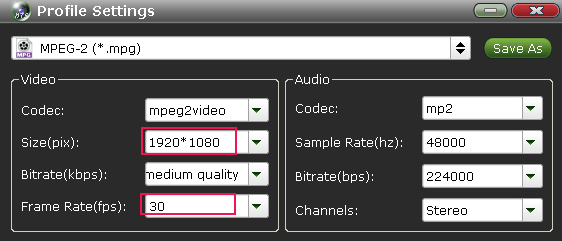
Click the "Format" bar and select Final Cut Pro> Apple PreRes 422(*.mov) as output format.


Tips: Hit the Settings icon, start to adjust the video and audio parameters, including the Bitrate of Video&Audio, Video Size, Sample Rate, Frame Rate, Audio Channels, etc. For smoothly editing 4K videos in iMoive, you're highly suggested to compress 4K to 1080p. Or you can keep its 4K resolution if you like.


Step 3: Begin Nikon D5/D500 4k UHD video files to ProRes MOV Conversion on Mac

When ready, click ‘Convert’ to start format conversion. Once the conversion process is complete, you can click ‘Open’ button to get the generated ProRes MOV files for editing in FCP with optimum performance.

Tips: If you don’t want to wait for the entire conversion process, you can tick off ‘shut down computer when conversion completed’ and go away to do other things.

More Articles:

Nikon D5/D500 4K MOV Editing Tips in Premiere Pro

Convert and Import Nikon D5/D500 4K video files to Windows Movie Maker

4K Workflow with Final Cut Pro X/7/6

Wednesday, May 18, 2016

Enable Samsung NX500 4K H.265 editable with Avid Media Composer

Summary: Have trouble importing Samsung NX500 4K H.265 footage into Avid Media Composer for further editing? Then you won't want to miss this post on the best workflow of working Samsung NX500 4K H.265 footage in Avid Media Composer.


The NX500 supports both 4K and UHD video recording, utilizing BSI APS-C sensors, the largest BSI sensor currently available, which provides more flexibility when it comes to capturing movies. At the same time, it records video using the new, space-saving H.265/HEVC video codec, which takes up about half the amount of memory card space as the oft-used H.265 codec, bringing efficiency to the storage of video clips without sacrificing any quality.

Though as it being, it may be a pain for Samsung NX500 owners if they want to work with 4K H.265(HEVC) footage in Avid Media Composer, since Avid Media Composer haven't yet supported for H.265(HEVC) codec. In addition, handling 4K video files is extreme hardware intensive for Avid Media Composer. Then there is any available way to enable Samsung NX500 4K H.265 clips editable with Avid Media Composer? According to our countless testing, the quick and easy workaround is to convert H.265 to a more editing-friendly format, such a Avid MC's Avid DNxHD *. mov.

Actually, it's not so hard to do the trick as long as you apply a professional H.265 converter app. Brorsoft Video Converter for Mac is just what you need to achieve your goal. With it, you can effortlessly transcode H.265 to Avid Media Composer friendly movie format fast while keeping the original quality. Besides Adobe Premiere, this software can also export Apple ProRes, AIC, MPEG-2 for Final Cut Pro, iMovie, Premiere Pro and more NLE systems.
If you are Windows users, Brorsoft Video Converter is the alternative choice. Below is the detailed guide on converting H.265 clips to Avid Media Composer friendly videos for smoothly playback and editing.

Download the best H.265 converter:

(Note: Click here for OS X 10.5)

Converting Samsung NX500 H.265 to Avid DNxHD for Media Composer

Step 1. Import H.265 video to the converter

Run the H.265 to Avid converter and click the Add Files button to import the H.265 videos to be converted. The converter supports converting multiple files at a time.


Step 2. Choose output format

This video converter offers optimized format preset for Avid. Click Format on the main interface and choose Avid Media Composer > Avid DNxHD(*.mov) as output format. It ensures the best quality while working with the output files in Avid.


Step 3. Start H.265 to Avid conversion

As soon as all the above settings are completed, you can press "Convert" button to start H.265 to DNxHD .mov conversion. You can follow the conversion process via the pop-up windows.

After conversion is done, simply click "Completed" to back to main interface, and click "Open" button to find generated DNxHD videos. Afterwards, you can transfer the converted Samsung NX500 H.265 footage into Avid Media Composer 5/5.5/6/6.5/7 for editing smoothly with ease.

More Articles:

Edit Samsung NX500 H.265 video files in Windows Movie Maker

How to Convert Samsung NX500 H.265 to H.264 for further Viewing or Editing

How to get Adobe Premiere Pro work with H.265 videos


Wednesday, May 11, 2016

How to Import Sony RX10 III XAVC S footage to Premiere Pro for further editing?

Summary: Have trouble of importing Sony RX10 III XAVC S video files into Premiere Pro? If so, you won't miss this post. It demonstrates the best workflow of editing RX10 III XAVC S clips in Premiere Pro.


With Sony's RX10 III 4K camera, professional 4K recording capability and still photography are presented in package ergonomically designed for handheld operation and portability. As it claimed, it can support MPEG-4, AVCHD and XAVC S video formats; And the UHD 4K video up to 30 fps in XAVC S format is the most favored format for most of its users, for it brings better quality and convenient for broadcasting. However, many of you may suffer from headaches when editing those UHD 4K XAVC S files in Premiere Pro as below:

“I'm using a newish iMac running El Capitan. I own a new Sony Cyber-shot DSC-RX10 III. I recently shot some xvac-s movies to test the format. I can watch the movies on the RX10 III but they are not recognized by the iMac when when I plug in the card and import it to Premiere Pro. JPEG and RAW files are recognized. Does anyone know why this happening And how to fix it?”

Granted the new version 8.2.0 of Adobe Premiere Pro CC can natively support XAVC S 4K and HD, but handling 4K video files in Premiere Pro is extreme hardware intensive and still not well supported by its previous versions. On this case, if you want to enable Sony RX10 III XAVC S clips editable in Premiere Pro smoothly, you'd better convert your XAVC S files to Premiere Pro's preferable video format initially. For this purpose, here are two ways offered for you to help you convert Sony DSC-RX100 III XAVC S raw videos into Premiere Pro editable formats.

Part I:Sony native supported gadgets
1. Sony XAVC/XAVC S Plug-in for Apple

Advantages: With this plug-in , you can load your Sony DSC-RX100 III XAVC S raw videos and XDCAM/XDCAM EX files into Premiere Pro for viewing and editing and it’s free.

Disadvantages: Difficult for newbie to use and only Mac version

2. Sony Catalyst Browser

Advantages: Catalyst Browse, a cross-platform viewing and logging tool for all Sony Pro formats, offers streamlined media management that simplifies your workflow and secures your content. It can transfer , edit or view XDCAM, XAVC or AVCHD clips. It support both Mac and Windows , also free.

Disadvantages: Less output options and when transfer to NLEs, some unknown problems may happen.

Part II: Applying for this powerful Brorsoft XAVC S Video Converter for Premiere Pro
The Powerful and easy-to-use Brorsoft XAVC S to Premiere Pro Converter(Mac) can be used to save all those troubles, even newbie can easily use it without any problem. With it, you can effortlessly transcode XAVC S files to MPEG-2 for Premiere Pro and it works well and converts flawlessly. Meanwhile, the excellent Video Conversion tool can also create files compatible with various non-linear editing systems like Avid Media Composer, FCE, FCP X, iMovie, and Final Cut Pro and more. Below is how.

How to convert Sony DSC-RX100 III XAVC S raw videos to Premiere Pro?

Step 1. Load XAVC S videos

Download, install and run the XAVC S to Premiere Pro Converter; click "Add" button on the top of the main interface to import source video to the program. It supports batch conversion and joining multiple video clips into one file.


Step 2. Select output format

Click "Format" pull down list to select Adobe Premiere/Sony Vegas> MPEG-2(*.mpg) as the best video format for Premiere Pro. WMV, MOV formats are the good choice as well.


Tip - Profile Settings:

In case the default settings do not fit your requirement, you can click "Settings" button and enter "Profile Settings" panel to adjust video size, bit rate, frame rate, sample rate and audio channels.

Step 3. Start converting XAVC S files

Hit the convert button, it will start converting XAVC S for Adobe Premiere Pro immediately. Soon after the conversion, just click "Open" button to get the generated files for natively editing in Premiere Pro CC/CS6/CS5/CS4 perfectly. Just enjoy your Sony DSC-RX100 III XAVC S recordings after editing XAVC S videos in Premiere Pro.

More articles:

How to Edit Sony PXW-Z150 4K XAVC footage in FCP 7/X

Import & Edit Sony A6300 4K/1080p XAVC S with Avid Media Composer

How to Import Blackmagic Design URSA Camera 4K files to FCP X/7

Wednesday, May 4, 2016

How to Edit Sony PXW-Z150 4K XAVC footage in FCP 7/X

Summary: If you want to import and edit Sony PXW-Z150 4K video in Final Cut Pro 7/X? Then you won't miss the best workflow of working Sony PX-Z150 4K XAVC files with FCP 7/X. Keep reading on...


The PXW-Z150 comes with a 29-348mm built in lens that offers a 12x optical zoom which is further augmented by Sony’s proprietary Clear Image Zoom technology. This means that the 12x optical magnification is further extended to 24x in HD and to 18x in 4K ultra HD. 4K recording in the new PXW-Z150 is delivered in the XAVC Long codec at a max bitrate of 100Mbps. After recording some stunning footage, most users perhaps want to edit those amazing 4K clips on Final Cut Pro - the most wonderful editing software on Mac before sharing with friends. While the result might lets you down:

"Hi! I was told the Sony PXW-Z150 footage can natively ingest into Final Cut Pro. But my footage is crashing every time I try to import. Any ideas?"

Actually, Sony itself has provided plug-ins like XAVC/XDCAM Plug-in for Apple (PDZK-LT2) to enable Final Cut Pro X ingest Sony XAVC files correctly. While, the plug-in requires Final Cut Pro X 10.1 or later, that means if you want to import Sony PXW-Z150 XAVC to Final Cut Pro 7 or its eariler version, it won’t work. In addition, handling 4K videos in FCP is usually extremely hardware intensive, in particular on a older computer. To solve all those problems, the easy and quick workaround is to convert and compress Sony 4K XAVC to ProRes.mov, which ensures the maximum editing efficiency and quality when working with FCP 7/X.

Different from 720p/1080p videos, the conversion of 4K video is in a higher standard, a professional 4K Video Converter is what you need. Featured with the most advanced converting technology, Brorsoft 4K Video Converter for Mac is the optimal choice for you. It allows you to convert Sony XAVC to Apple ProRes 422, ProRes 4444 with zero quality loss on Mac(Yosemite, El Capitan included). Plus, it also supports transcoding Sony XDCAM, XDCAM HD, XDCAM EX to AIC .mov for iMovie, DNxHD for Avid Media Composer, MPEG-2 for Adobe Premiere Pro. Now I will show you how to transcode Sony PXW-Z150 4K XAVC to ProRes MOV for Final Cut Pro X/7 in detail.

(Note: Click here for OS X 10.5)

Converting Sony PXW-Z150 XAVC for Editing in Final Cut Pro 7

Step 1: Import XAVC videos

Install and run the XAVC Video Converter on your Mac, then run it. Click on “Add”, and browse your files; select all the XAVC files you wanna convert. If you want to combine all the files together for easy importing to FCP, please tick the box “Merge into one” on the main interface.


Step 2: Click on Format, and from the dropdown menu, here I recommend Final Cut Pro > Apple ProRes 422 (*.mov) as the output format. Then you can set the output folder as you want.


Step 3: Adjust video, audio settings

Click the “Settings” button and customize proper video/audio parameters including Video size, bitrate and fame rate and mroe. Usually 1920*1080 video size and 30fps video frame rate are recommended for FCP editing. Well, if you prefer to work with 4K video, you can adjust video size to get 4K ProRes for FCP.

Step 4: Start XAVC to ProRes conversion

After all necessary settings, hit the convert button to start converting XAVC video to ProRes for FCP 7 on Mac OS X.

Once the conversion process shows in 100%, click Open to get the output videos. Create a project and start editing Sony PXW-Z150 XAVC files in Final Cut Pro 7 with light speed.

Related Articles:

How to Import and Edit Sony Action Cam footage in Premiere Pro

Import & Edit Sony A6300 4K/1080p XAVC S with Avid Media Composer

Easy way to Transfer Sony FDR-X1000V 4K to FCP/Premiere