
iMovie is a well-known video editing software developed by Apple Inc. It allows users to share their favorite moments, and create amazing HD movies and Hollywood-style trailers. With iMovie, you can make videos and share them on the internet when you’re lying on the beach without moving your body, and also create a birthday party movie and send it to your parents. What if we want to edit DVD clips with iMovie?
In general, suppose you want to edit a homemade DVD in iMovie on Mac, you can import the DVD video to iMovie without using DVD ripping software like Handbrake only if you still had the original video, which should be created by iPhone, iPad or other Apple devices instead of any other HD camcorders. While when it comes to commercial DVDs, DVD Ripper maybe a must, since Handbrake is incapable of ripping DVD with copy protections. Luckily, there is still other DVD to iMovie ripping software solutions for Mac you can easily find, such as Brorsoft DVD Ripper for Mac.
With its help, you can effortlessly convert DVD video to iMovie highly compatible Apple InterMediate Codec .mov without losing any video quality on Mac OS X (El Capitan included). Besides iMovie, this excellent utility also offers other advanced codecs like ProRes, MPEG-2, DNxHD for editing smoothly on Final Cut Pro, Premiere Pro, Avid Media Composer and more! Now let's walk you through the process of ripping DVD to iMovie with smooth workflow.
How to convert DVD to iMovie supported video format
STEP 1. Load DVD movies
Insert the DVD disc into your Mac's DVD drive and click Import DVD icon to load the DVD movies. Or simply drag the DVD disc icon on the desktop to the program. Loaded DVD movies can be previewed in the right preview window and you're free to take snapshots of your favorite DVD movies. In addition, you can select the subtitle and audio track as you like.
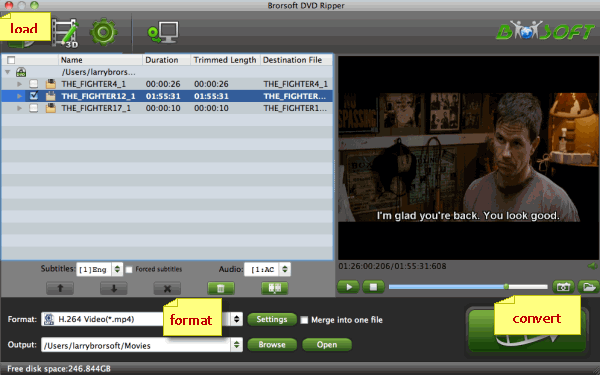
STEP 2. Select output format
Next, choose an output format for iMovie. Click the Format icon to open the format list. Then select iMovie and Final Cut Express -> Apple InterMediate Codec (AIC)(*.mov), as the output format to get videos with optimized settings for iMovie.
Tip: If you want to customize the profile, you can click settings to use the parameters you want.
STEP 3. Start conversion
When all the settings are fine, click the Convert button to start converting your DVD movies to optimized AIC .mov video files for iMovie. When then conversion completes, click the Open button to get the ripped video files. Launch iMovie and click File > Import > Movies to import the converted videos to iMovie for further editing. Just create your masterpiece with joy!
Related Guides:
Rip & Import DVD to Sony Vegas Pro 13/12/11/10
No comments:
Post a Comment